
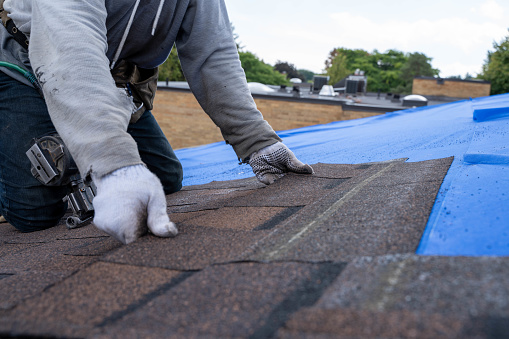
Maintaining the integrity of your roof is crucial to safeguarding your home from the elements. Whether it’s from storm damage, aging, or other wear and tear, roof shingles occasionally need repairs. If you’re a handy homeowner, you might consider tackling this task yourself. This guide will walk you through essential tips for DIY shingle repair, ensuring your roof remains in top condition without calling in a professional.
Barrie Roofing | Ainger Roofing
Understanding Roof Shingles
Roof shingles are the outermost layer of your roof, providing a protective barrier against rain, wind, and sun. If shingles are damaged, repair will be necessary to ensure that barrier remains effective. They come in a variety of materials, but asphalt shingles are the most common in residential homes due to their affordability and durability.
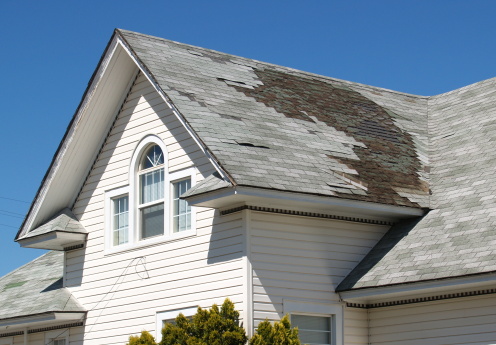
Signs You Need to Repair Your Roof Shingles
- Missing Shingles: If you notice bare spots on your roof, it’s a sign that shingles have been blown off or damaged.
- Curling or Cracking: Shingles that are curling at the edges or have visible cracks are no longer effective in protecting your roof.
- Granule Loss: If you find granules in your gutters or downspouts, it may indicate that your shingles are wearing down.
- Leaks or Water Stains: Water spots on your ceiling or walls can be a sign of a roof leak, often caused by damaged shingles in need of prompt repair.
Tools and Materials You’ll Need For Shingle Repair
Before starting your DIY project, gather the necessary tools and materials for changing roof shingles. For most you’ll use a ladder, hammer, utility knife, replacement shingles and roofing adhesive.
- Ladder
- Hammer
- Pry bar
- Roofing nails
- Replacement shingles
- Roofing adhesive
- Utility knife
- Safety gloves
- Goggles
Steps to Replace Damaged Roof Shingles
Once you have identified damaged shingles and gathered your materials, follow these steps to replace them. Your attention to detail in shingle repair during this process will help your roof last for years.
1. Ensure Safety First
Safety should be your top priority. Make sure you have a sturdy ladder, wear safety gloves, and use goggles to protect your eyes from debris. For any work including shingle repair, it’s also advisable to work on a clear, dry day to prevent accidents.
2. Remove the Damaged Shingle
Start by loosening the damaged shingle. Use a pry bar to lift the shingle above the damaged one gently. During shingle repair, remove the nails securing the damaged shingle, then slide it out.
3. Prepare the Replacement Shingle
Take a new shingle and cut it to match the size of the one you removed. When you are handling shingle repair, if your shingles are asphalt, you can cut them easily with a utility knife.
4. Install the Replacement Shingle
Slide the replacement shingle into position, ensuring it aligns with the surrounding shingles. Nail it in place using roofing nails. This step of shingle repair makes sure the nails are covered by the shingle above to prevent leaks.
5. Seal the Shingle
Apply roofing adhesive under the edges of the surrounding shingles and press down to secure them. Using adhesive in shingle repair will help prevent wind from lifting the shingles.
Tips for Successful Asphalt Shingle Repair
- Check the Weather: Ensure the weather is dry and calm before starting your repair. Wet or windy conditions can make the work dangerous and less effective. Shingle repair should always be done during favorable conditions.
- Regular Maintenance: Additionally, Regularly inspect your roof for signs of wear and tear. Early detection can prevent more extensive damage and lessen the frequency of shingle repair.
- Use Quality Materials: Always use high-quality shingles and roofing materials to ensure the longevity of your repairs.
When to Call a Professional For Shingle Repair
- Extensive Damage: If your roof has significant damage or multiple missing shingles, a professional roofer can provide a comprehensive repair.
- Structural Issues: Additionally, If you suspect underlying structural issues, it’s best to have an expert assess the situation.
- Safety Concerns: If you’re uncomfortable working at heights or lack the necessary equipment, hiring a professional is the safest option, especially for complicated shingle repair jobs.
Preventing Future Roof Damage
- Regular Inspections: Conduct regular roof inspections, especially after severe weather events.
- Clean Gutters: Ensure your gutters are clean to prevent water from backing up and damaging your roof.
- Trim Overhanging Branches: Trim any branches that hang over your roof to prevent damage from falling limbs and decrease the risk of costly shingle repair in the future.
Conclusion
Repairing roof shingles can be a straightforward DIY project if you follow the right steps and prioritize safety. By understanding the signs of damage, using the correct tools, and knowing when to call a professional, you can maintain the integrity of your roof and protect your home. Regular maintenance and inspections will help extend the life of your roof, saving you time and money in the long run. Tackling your own empowers you to keep your home protected year-round.
Remember, while DIY repairs can be rewarding, don’t hesitate to seek professional help if the task becomes overwhelming or dangerous. Your safety and the safety of your home should always come first.